Hey folks!. This is my first post (and guide) but Ive been lurking for a while and have found a lot of useful info buried in these pages that has helped me save a tidy sum by doing maintenance myself.
So….. since I couldn’t find any complete info about replacing the fuel filter, I thought I would do my own full guide. Sorry if this is a bit long, I wanted to be thorough!.
Disclaimer: This is the first time Ive changed a fuel filter and I'm far from an experienced mechanic - most of the names of parts and what they are/do are just educated guesses.
---------
First of all the manual says the filter should be replaced at 54k miles and my car is now on 68k! so it was long overdue. The filter is an ‘in-tank’ type and I got mine from mark at Fordprobestore. (He also has an engine bay type available, but I haven’t a clue where this is located and from scattered bits of info on this forum it’s seems the BJ doesn’t have one, so that’s still all a mystery to me)
This is a pretty easy task and took me a couple of hours with a break for a brew. The part that takes longest is removing and refitting the seats, but since my car has got the sliding rear seats I’m guessing the job will be even easier for those of you who don’t
Step 1:
To start with - remove rear seats (my car has sliding rear seats, yours may remove differently). On my car this consisted of undoing a load of plastic b*****d things that get all mashed when you take them out (they hold in the carpet) then unscrew the metal base panels.
Remove some plastic covers on either side of the rear seats (you will no doubt break the tabs on these in some way as I did, but they go back on fine).
This reveals four 17mm bolts. Undo these. There are four more 17mm bolts holding down the ratchet slider rails. Undo these too.
Take out the rear seats.
Here’s a few photos of the first step:
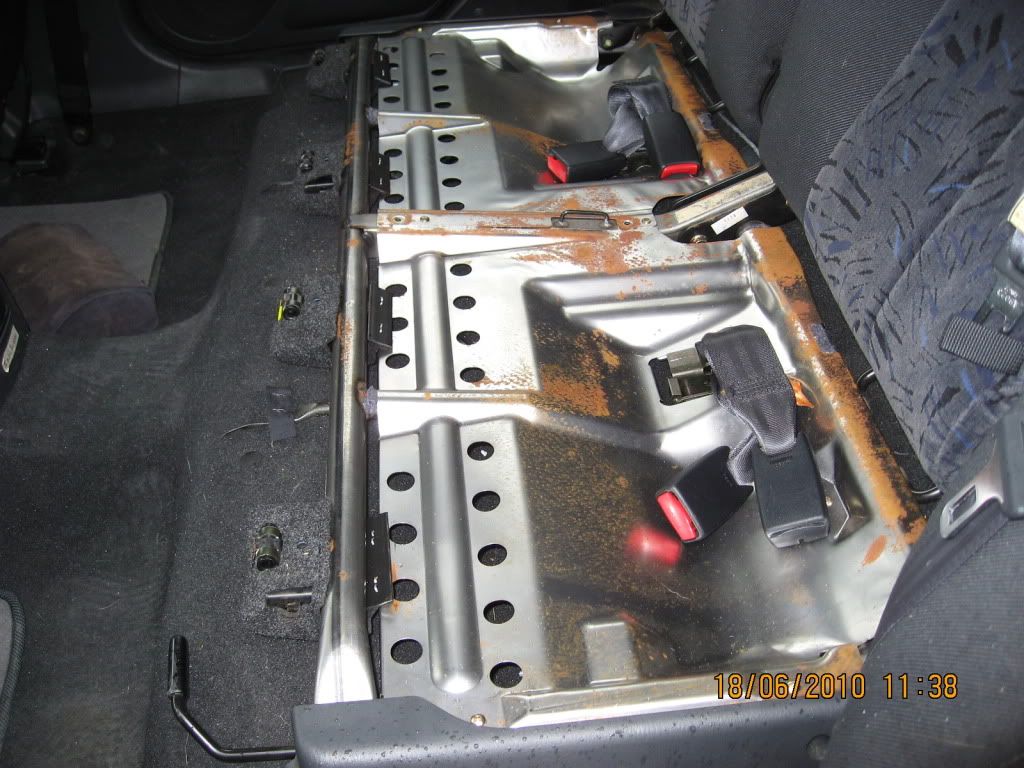


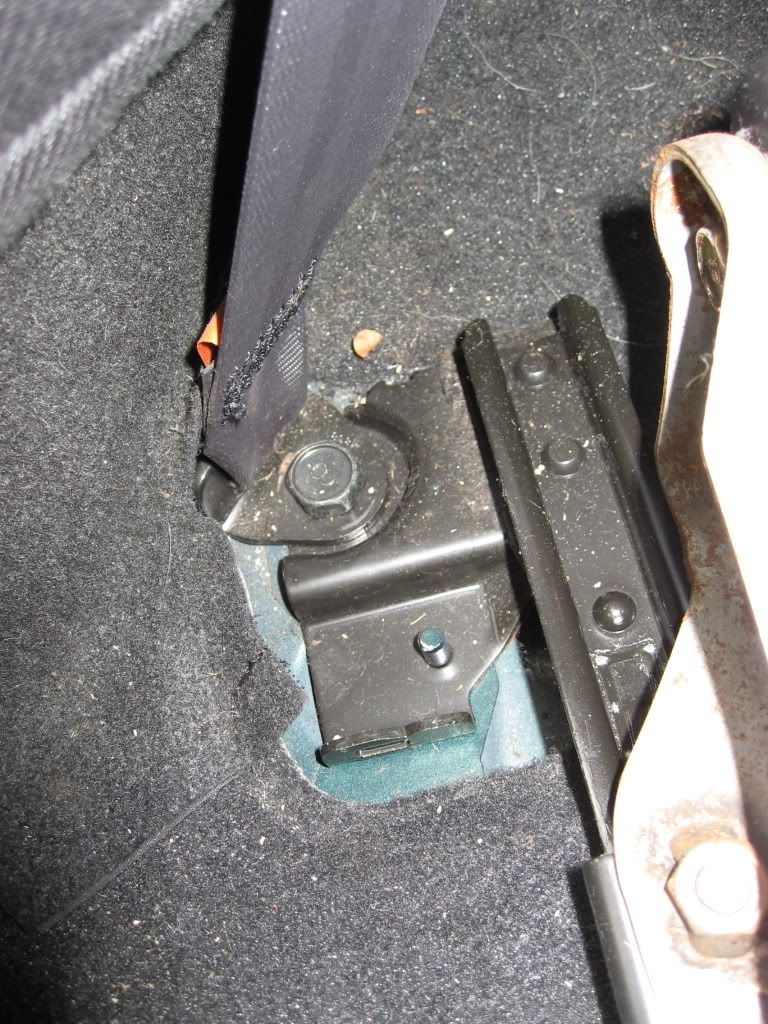

The seats out!:

Step 2:
Lift up the carpet flap to reveal the access panel to the fuel tank.

Remove the four screws on the access panel and lift away.
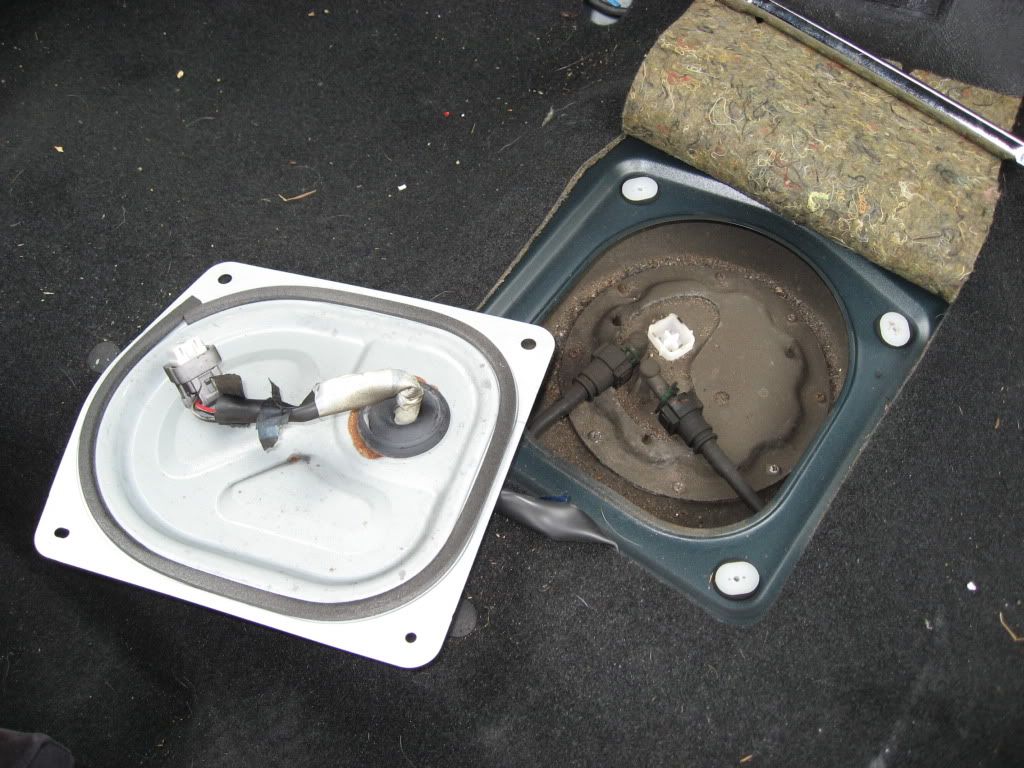
This is the top of the fuel pump unit (the fuel filter if inside). This whole area was covered in dust and bits, so I got out the dyson and gave the whole area a good vacuuming. This is a must!. As soon as you take out the pump unit all that dust and crap would fall into you fuel tank if you don’t vacuum it away first.

Undo the two fuel hoses by pressing in the side buttons and wiggling them off. Only the top hose in the photo will actually have fuel in it. Be ready for any fuel dribbling out - have a rag to hand. I bunged this hose up with a scrap of cloth to stop it dribbling out while it was unhooked.

Undo the small screws that hold the pump in place. There is quite a few of them and after 11 years outdoors they were delicate on my car. Take care not to round off the heads. I used a small 12v drill on a low torque setting with lots of body weight ontop of it.
One head I almost ruined

Undo the connector and remove the fuel pump unit. Let the fuel dribble out, then flip it over and let some more dribble out from the hose connector at the top.
Here is the unit

and here is the empty hole

at this stage I laid out some rags and continued the job on the garage floor, so that I didn’t stink the car out with fuel.
Undo the connector on the side of the unit ( there are two, one behind the other, but the second it easier to undo later)

using a small flat head screwdriver undo the 4 plastic clips that hold the bottom of the unit onto the top. This bit is tricky, take your time and don’t split the plastic. Here it is separated.

Then undo the second connector
undo the orange bit on the bottom to free the filter

take out the filter and push out the pump

If you are lucky the pump will bring the rubber seal with it. But for me it got left behind!

So I had to invent a new tool to retrieve it. Get a piece of stiff wire and bend the end over to form a hook, cover this all with some electrical tape (so that the wire end doesn’t damage the rubber seal). Poke it up into the seal and hook it out.
Ta-Da! (patent pending)

Put the rubber seal on the pump and refit it into the new filter

Reverse all the stages, remembering to reconnect all the connectors as you go and take care not to strip those screw heads when putting the unit back in the car.
When putting the fuel hoses back on, make sure they ‘snap’ back into place. If they don’t snap then you haven’t pushed them back on far enough.
Before refitting the seats, try starting the engine. It should take a couple of chugs for it to suck some fuel through the new filter then start up as normal.
Refit the seats and you are done!
Good luck & I hope this helps!. It should be an easy job for virtually anyone out there after you have gotten over the intimidating factor of working on the fuel system and will save a fair bit on labour at your local garage.

 Login
Login Register
 FAQ
FAQ Search






 Good work


 )
)